Firebase Setup
Firebase is a platform developed by Google for creating mobile and web applications. It provides a variety of services like authentication, real-time database, cloud storage, and more. In this section, we will set up Firebase for our Flutter project.
Pre-requisites
- Install Node.js from here
- Install Firebase CLI by running the following command in your terminal:
npm install -g firebase-tools- Login to Firebase by running the following command in your terminal:
firebase login- Install FlutterFire cli by running the following command in your terminal:
dart pub global activate flutterfire_cliFirebase Setup
- In the root of your project, run the following command:
flutterfire configureSelect the Firebase project you want to use for this Flutter project, or create a new one.
Enable
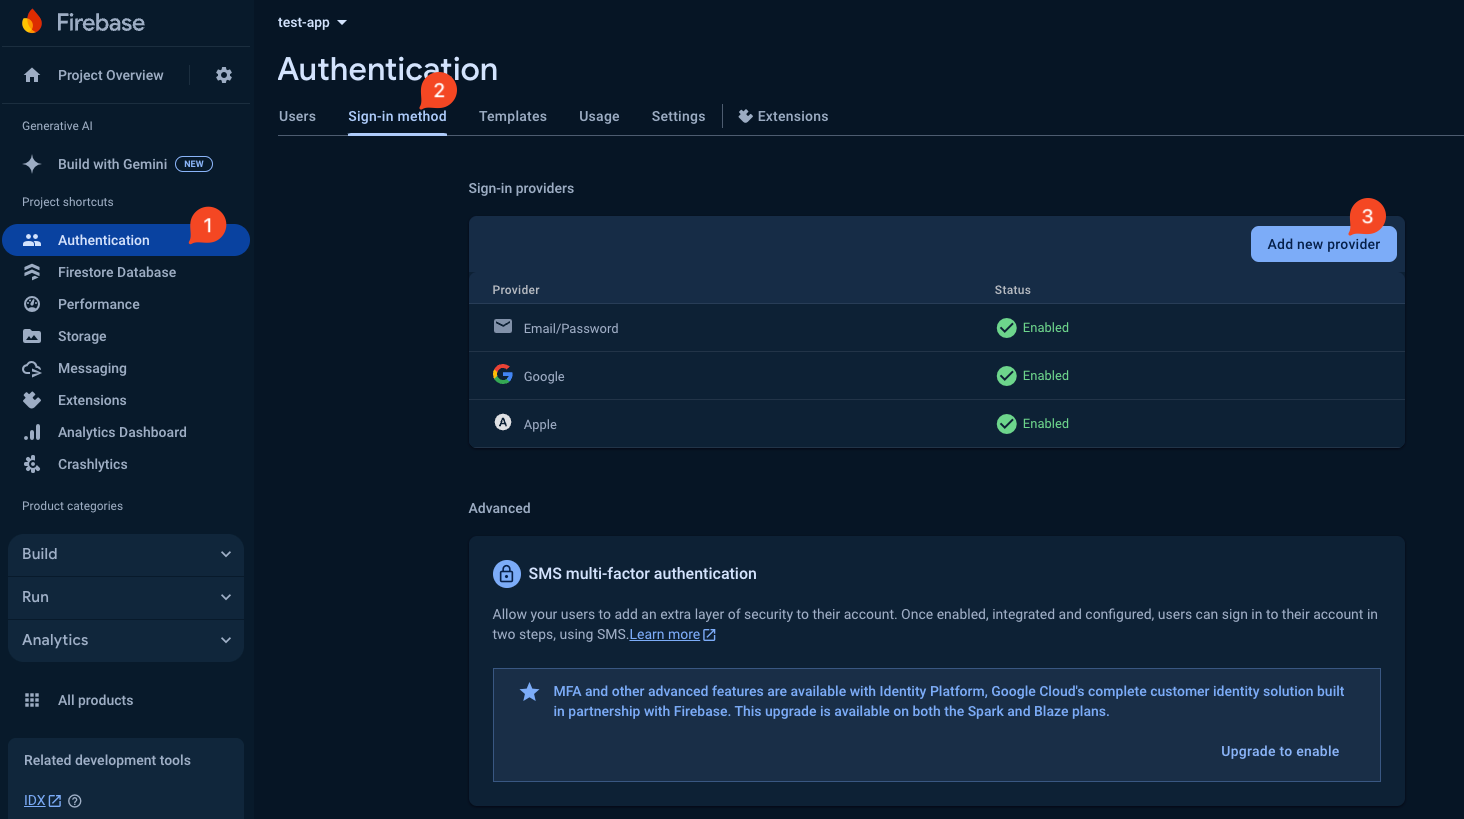
androidandiosplatforms for Firebase Authentication in the cli.Go to firebase console, select your project, and navigate to
Authenticationtab. Then click onGet Startedto enable Firebase Authentication. Then click onSign-in methodtab and enableemail,google, andapplesign-in methods.
- Generate SHA-1 and SHA-256 keys for your app by running the following command in your terminal:
In MacOS:
keytool -list -v -keystore ~/.android/debug.keystore -alias androiddebugkey -storepass android -keypass androidIn Windows:
keytool -list -v -keystore "\.android\debug.keystore" -alias androiddebugkey -storepass android -keypass androidIn Linux:
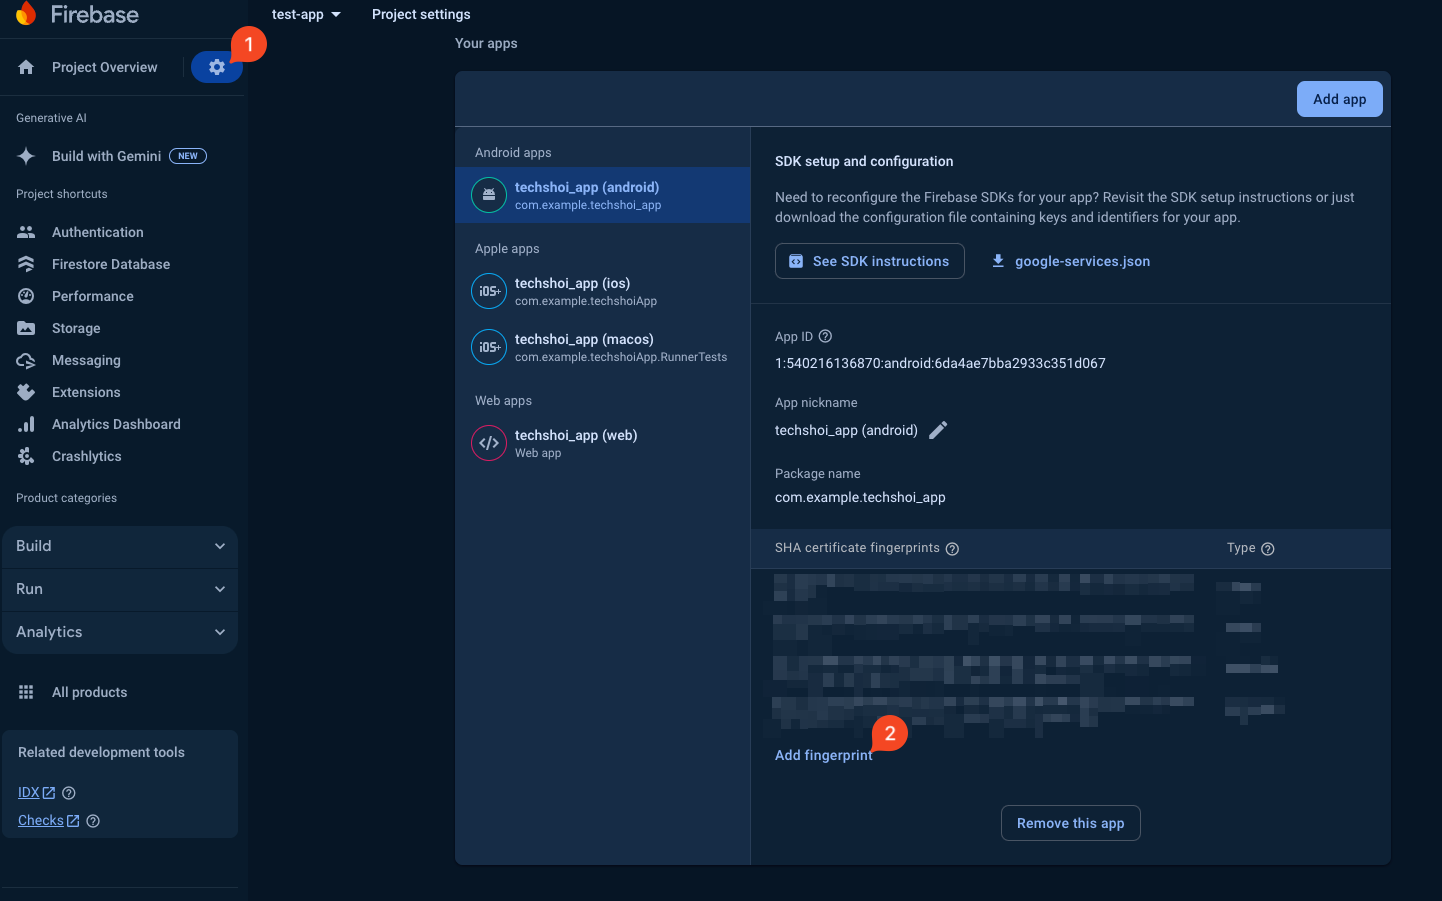
keytool -list -v -keystore ~/.android/debug.keystore -alias androiddebugkey -storepass android -keypass android- Copy the SHA-1 and SHA-256 keys and paste them in the Firebase console under
Project settings->General->Your apps->SHA certificate fingerprints.
Enable
Firestore Database,Analytics,Storage,Crashlytics, andFirebase Cloud Messagingin the Firebase console.Download the
google-services.jsonfile and replace the existing file created by flutterfire_cli in theandroid/appdirectory of your Flutter project.Copy the client id for web and android from your
google-services.jsonorfirebase_options.dartfile and paste it into the.envfile underGOOGLE_CLIENT_ID_APPandGOOGLE_CLIENT_ID_WEBvariables.Go to Firebase dashboard and enable
Firestore database,Storage,Analytics,Crashlyticsone by one. You may need to download thegoogle-services.jsonfile again after this.
Firebase Functions Setup
The boilerplate includes Firebase Cloud Functions that automatically manage user data when users sign up or delete their accounts. These functions create and delete user documents in the Firestore users collection.
What the Functions Do
The Firebase Functions in the functions directory provide:
- onUserCreated: Automatically creates a user document in Firestore when a new user signs up via Firebase Authentication
- onUserDeleted: Automatically deletes the user document from Firestore when a user account is deleted
Prerequisites
Ensure you have Firebase CLI installed and are logged in (covered in the pre-requisites section above).
Deploy Firebase Functions
- Navigate to the
functionsdirectory in your project:
cd functions- Install the required dependencies:
npm install- Build the TypeScript functions:
npm run build- Deploy the functions to Firebase:
firebase deploy --only functionsVerify Deployment
- Go to the Firebase Console
- Select your project
- Navigate to Functions in the left sidebar
- You should see two deployed functions:
onUserCreatedonUserDeleted
Function Details
The functions automatically handle:
User Creation: When a user signs up, creates a document in the
userscollection with:- User ID, email, display name, photo URL, phone number
- Authentication provider information
- Created and updated timestamps
User Deletion: When a user account is deleted, removes the corresponding document from the
userscollection
These functions ensure your Firestore database stays in sync with Firebase Authentication automatically.